This is a recommends products dialog
Top Suggestions
Starting at
View All >
Language
French
English
ไทย
German
繁體中文
Country
Hi
All
Sign In / Create Account
language Selector,${0} is Selected
Register & Shop at Lenovo Pro
Register at Education Store
Pro Tier Benefits
• Save up to an extra 20% on Think everyday pricing.
• Spend $15K, advance for FREE to Plus Tier with increased benefits.
• Save up to an extra 20% on Think everyday pricing.
• Spend $15K, advance for FREE to Plus Tier with increased benefits.
Plus Tier Benefits
• Save up to an extra 25% on Think everyday pricing.
• Spend $50K, advance for FREE to Elite Tier with increased benefits.
• Save up to an extra 25% on Think everyday pricing.
• Spend $50K, advance for FREE to Elite Tier with increased benefits.
Elite Tier Benefits
• Save up to an extra 30% on Think everyday pricing.
• Save up to an extra 30% on Think everyday pricing.
Reseller Benefits
• Access to Lenovo's full product portfolio
• Configure and Purchase at prices better than Lenovo.com
• Access to Lenovo's full product portfolio
• Configure and Purchase at prices better than Lenovo.com
View All Details >
more to reach
PRO Plus
PRO Elite
Congratulations, you have reached Elite Status!
Pro for Business


TEMPORARILY UNAVAILABLE
DISCONTINUED
Temporary Unavailable
Cooming Soon!
. Additional units will be charged at the non-eCoupon price. Purchase additional now
We're sorry, the maximum quantity you are able to buy at this amazing eCoupon price is
Sign in or Create an Account to Save Your Cart!
Sign in or Create an Account to Join Rewards
View Cart
Your cart is empty!
Don’t miss out on the latest products and savings — find your next favorite laptop, PC, or accessory today.
Remove
item(s) in cart
Some items in your cart are no longer available. Please visit cart for more details.
has been deleted
Please review your cart as items have changed.
of
Contains Add-ons
Subtotal
Proceed to Checkout
Yes
No
Popular Searches
What are you looking for today ?
Quick Links
Recent Searches
Hamburger Menu
-
Lenovo Pro Business Store{{loyaltyMsg}}
Lenovo Pro Business Store
Lenovo Pro Business Store -
Lenovo Education{{loyaltyMsg}}
Lenovo Education
Lenovo Education -
WishList
 WishList
 -
Contact Us
{{contactNumber}}
Contact Us
Sales:
Home:
Business:
{{SmallBusinessNumber}}
(Servers & Storage included)Order Support:
-
Lenovo Pro Business Store{{loyaltyMsg}}
Lenovo Pro Business Store
Lenovo Pro Business Store -
Lenovo Education{{loyaltyMsg}}
Lenovo Education
Lenovo Education -
WishList
WishList
-
Contact Us
{{contactNumber}}
Contact Us
Sales:
Home:
Business:
{{SmallBusinessNumber}}
(Servers & Storage included)Order Support:

skip to main content
-
Account{{userInfo.userNameAbb || ''}}Hi , {{userInfo.firstName}}!
Sign In / Create Account
Account
Sign in / Create Account
Keep track of your wishlist, orders, and My Lenovo rewards, all in one place

My Account
Access your orders, subscriptions, saved carts, rewards balance, and profile

Create a wishlist of your favorite products

View & track your orders
Register your product and/or update your warranty dates
Sign out
-
Cart
{{cartCount}}
Cart
-
Account{{userInfo.userNameAbb || ''}}Hi , {{userInfo.firstName}}!
Sign In / Create Account
Account
Sign in / Create Account
Keep track of your wishlist, orders, and My Lenovo rewards, all in one place
My Account
Access your orders, subscriptions, saved carts, rewards balance, and profile
Create a wishlist of your favorite products
View & track your orders
Register your product and/or update your warranty dates
Sign out
-
Cart
{{cartCount}}
Cart
-
SALE
-
Popular DealsAI PC Laptop Sale Desktop Sale Gaming Sale Powerful Workstations Accessories Sale Deals on Customisable PCs
-
Additional OffersThinkPad Deals Yoga Deals IdeaPad Deals ThinkBook Deals ThinkCentre Deals Intel PC Deals AMD PC Deals Yoga + IdeaPad Offers
-
Weekly Flash DealsWeekly PC Deals Student Offers Offers on Lenovo Pro Quickship Sale New Arrivals Coupon Code Offers
-
-
Laptops
-
Explore LaptopsAI PC Copilot+ PC 2-in-1 Laptops Business Laptops Gaming Laptops Workstation Laptops Laptops for Everyday Use Student Laptops Touchscreen Laptops Windows 11 PCs NEW | 16:10 Screen Ratio Customisable Laptops View All Laptops
-
By BrandThinkPad Yoga ThinkBook Legion IdeaPad LOQ Gaming
-
Trending NowYoga Slim 7x Gen 9 (14″ Snapdragon) ThinkPad P16s Gen 3 16" Intel ThinkPad P14s Gen 5 14" Intel ThinkPad P1 Gen 7 16" Intel ThinkPad X1 Carbon Gen 12 ThinkPad T14 Gen 5 14" AMD ThinkPad X12 Gen 2 Detachable 12" Intel ThinkPad X1 2-in-1 Yoga 7 2-in1 ThinkPad P14s Gen 4 ThinkPad E14 Gen 5 ThinkPad E16 Gen 1 Legion 5i Gen 9 New Arrivals
-
By SeriesThinkPad X1 Series ThinkPad T series ThinkPad P Series ThinkPad E Series Legion 5 Series Legion Pro Series Yoga 2-in-1 Series Yoga Pro Series ThinkPad L Series
-
-
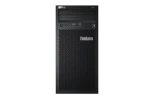
Desktops
-
Explore DesktopsBusiness Desktops Everyday Desktops Gaming Desktops Tiny Desktops All-in-ones Desktops Sale Find My Desktop View All Desktops
-
By BrandThinkCentre ThinkCentre Neo Series ThinkStation Workstations Legion Towers IdeaCentre
-
Desktops with Tiny Form FactorThinkCentre Neo 50q ThinkCentre M70q ThinkCentre M90q ThinkCentre Neo 50q Gen 4 TinyDesktops with Small form FactorThinkCentre Neo 50s ThinkCentre M70s ThinkCentre M90s
-
All-in-onesThinkCentre Neo 50a Gen 5 24" AIODesktop TowersThinkCentre Neo 50t ThinkCentre M70t
-
-
Workstations
-
Explore WorkstationsMobile Workstations Desktop Workstations Find My Workstation ThinkStation P Series Workstations Workstation Deals View All Workstations
-
By BrandThinkPad ThinkStation
-
Mobile WorkstationsThinkPad P16s Gen 3 16" Intel ThinkPad P14s Gen 5 14" Intel ThinkPad P1 Gen 7 16" Intel ThinkPad P14s Gen 4 ThinkPad P16s Gen 2 ThinkPad P16v Gen 1 ThinkPad P1 Gen 6 ThinkPad P16 Gen 2 ThinkPad P16s Gen 2 AMD
-
Desktop WorkstationsThinkStation P3 Tiny ThinkStation P3 Ultra ThinkStation P3 Tower ThinkStation P5 Tower ThinkStation P7 Tower ThinkStation PX Tower ThinkStation P620 Tower
-
-
Gaming
-
Explore Lenovo GamingGaming Laptops Gaming Accessories Gaming Monitors Customisable Gaming PCs Gaming Deals Lenovo Legion Lenovo LOQ View All Gaming PCs
-
Gaming Accessories & PC GamesGaming Headsets Keyboards & Mice Gaming Monitors All Gaming Accessories FREE XBOX Gamepass 12 Mos. Utomik Pass
-
Trending NowLegion 5i Gen 9 Legion Pro 7i Gen 9 Legion 9i (16", Gen 9) Legion Pro 5i (16″, Gen 9) Legion Slim 5 Gen 8 Lenovo LOQ 15IAX9 Gaming Laptop
-
-
Monitors
-
Explore MonitorsOffice Monitors Monitors for Home Monitors for Professional Portable Monitors Monitor Accessories Deals on Monitors View All Monitors
-
Monitors by SizeMonitors Less than 23" 27" - 28" Monitors 29" or More
-
Monitors by Resolution & Shape4K - Best QHD - Better FHD - Good Curved & Ultrawide Monitors
-
Trending MonitorsThinkVision T24i ThinkVision T27h ThinkVision P24h ThinkVision T34w
-
Portable MonitorsThinkVision M14t FHD Touch
-
-
Accessories & Software
-
Explore AccessoriesAudio Gaming Accessories Keyboards & Mice Cases & Backpacks Docking Stations Webcams & Camera Accessories Accessories Sale Find Compatible Accessories Explore All Accessories
-
Software SubscriptionsSecurity & Antivirus Graphics & Creativity Vantage for SMB View All Software
-
By BrandLenovo GO Lenovo Accessories Legion Accessories ThinkPad Yoga 3M Ergotron
-
-
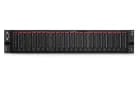
Servers & Storage
- Explore Servers Rack Servers Tower Servers Edge Servers Multi-Node Servers Mission Critical Servers Options & Accessories
- Explore Storage Unified Storage Storage-Area Network Direct-Attached Storage Tape Storage Options & Accessories
- Explore SDI ThinkAgile HX Series (with Nutanix) ThinkAgile MX Series (with Microsoft) ThinkAgile SX Series (with Microsoft) ThinkAgile Vx Series (with VMware)
- Explore Software Infrastructure Software Management Software Lenovo Open Cloud Automation Cloud Marketplace
-
Learn
-
Industry TrendsHybrid AI Cloud Computing Data Management Edge Computing Infrastructure Service
-
Partners/AlliancesAMD Solutions Intel Solutions Microsoft Solutions Nutanix Solutions NVIDIA Solutions Red Hat Solutions SAP Solutions VMware Solutions
-
ResourcesSmarter infrastructure stories Lenovo Press Lenovo Xperience Newsroom Executive Briefing Center
-
-
Solutions
-
Explore SolutionsBackup & Disaster Recovery Big Data & Analytics Business Applications Client Virtualization & Infrastructure Cloud Service Provider
-
More SolutionsDatabase Edge-AI High-Performance Computing Hybrid Cloud Lenovo Value Recovery Kubernetes and Containers OEM
-
Business SolutionsSAP Small and Medium Business Storage Solutions Telco Infrastructure Services Shop All Solutions
-
ResourcesSmarter infrastructure stories Lenovo Partner Hub
-
-
Servers
-
Explore by ProcessorAMD Servers Intel Servers
-
Explore ServersRack Servers Tower Servers Edge Servers Mission Critical Servers Multi-Node Servers Options & Accessories
-
-
Storage
-
Explore StorageUnified Storage Storage-Area Network Direct-Attached Storage Tape Storage
-
ResourcesOptions & Accessories
-
-
Software-Defined Infrastructure
-
Software
-
Explore SoftwareInfrastructure Management Cloud Marketplace
-
-
Shop Deals
-
AI
-
Warranty Lookup
-
Genuine Lenovo Parts
-
PC Services
- Support Services Premier Support Plus Premium Care Plus Premium Care Replacement Parts Store Lifecycle Warranty & Protection CO2 Offset Services
-
Deployment ServicesPlanning & Optimization Asset Management Customization Post Deployment
-
Managed ServicesDevice as a Service (Daas) Smart Lock Healthcare
-
Data Center Services
-
Solutions
- Product Solutions AR/VR Smart Edge Workplace Solutions OEM Solutions Smart Collaboration Digital Workplace Solutions Lenovo Certified Refurbished Explore More >
-
Solutions by TopicBig Data Cloud Employee Experience Productivity Remote Working Explore More >
- Solutions by Industry Education Financial Services Public Administration Explore More >
-
Support
-
Customer SupportHelp Placing an Order Warranty Lookup Genuine Lenovo Parts Shopping Help
-
Order SupportExisting Order Help Lenovo Return Policy
-
Technical SupportPC Support Data Center Support Smart Devices Support Motorola Mobile Support All Technical Support
-
{"backgroundColor":"#e6f4fa","sideMsg":"","data":[{"bannerInfo":{"t_id":"Page3509b87e-8d83-4ee9-a921-6ad29f966061","language":{"en_nz":"%3Cp%3E%3Cspan%20style%3D%22text-wrap%3A%20wrap%3B%22%3ENeed%20Help%3F%26nbsp%3B%3C%2Fspan%3E%3Ca%20target%3D%22_self%22%20href%3D%22tel%3A0800%20446%20833%20Option%20%232%22%20style%3D%22text-wrap%3A%20wrap%3B%20color%3A%20rgb(41%2C%2078%2C%20149)%3B%22%3ECall%20us%20on%200800%20446%20833%20Option%20%232%3C%2Fa%3E%3Cspan%20style%3D%22text-wrap%3A%20wrap%3B%22%3E%26nbsp%3Bor%26nbsp%3B%3C%2Fspan%3E%3Ca%20target%3D%22_self%22%20href%3D%22https%3A%2F%2Finside.chat%2FLenovoNZ%22%20style%3D%22text-wrap%3A%20wrap%3B%20color%3A%20rgb(41%2C%2078%2C%20149)%3B%22%3Echat%20with%20us%3C%2Fa%3E%3Cspan%20style%3D%22text-wrap%3A%20wrap%3B%22%3E%26nbsp%3Bfor%20order%20related%20help%20and%20access%20to%20special%20deals!%3C%2Fspan%3E%3C%2Fp%3E","en":""},"id":"Page3509b87e-8d83-4ee9-a921-6ad29f966061"}},{"pcInfo":"","mAndTabInfo":"","bannerInfo":{"t_id":"Pageb4cee1e4-536e-42e7-9c3f-81d514da0927","language":{"en_nz":"%3Cp%3E%3Cimg%20src%3D%22https%3A%2F%2Fp3-ofp.static.pub%2Ffes%2Fcms%2F2022%2F09%2F20%2Fsgy8gw8u4tymopd8g2224x0drocvbb133978.png%22%20alt%3D%22zip-logo%22%20style%3D%22text-wrap%3A%20wrap%3B%22%2F%3E%3Cspan%20style%3D%22text-wrap%3A%20wrap%3B%22%3E%26nbsp%3BWanting%20to%20use%20ZIP%3F%20Chat%20with%20us%20or%20call%20us%20on%200800%20446%20833%20option%232%3C%2Fspan%3E%3C%2Fp%3E","en":""},"id":"Pageb4cee1e4-536e-42e7-9c3f-81d514da0927"},"gInfo":""},{"pcInfo":"","mAndTabInfo":"","bannerInfo":{"t_id":"Pageb354b4f9-4d6e-4fae-92d1-a9fe88aa495d","language":{"en_nz":"%3Cp%3E%3Cspan%20style%3D%22text-wrap%3A%20wrap%3B%22%3ELenovo%20Education%20Store%20%7C%20Get%20access%20to%20members-only%20pricing%20across%20a%20large%20range%20of%20PCs%20%26amp%3B%20accessories.%20Sign%20up%20now%20with%20your%20Education%20ID.%26nbsp%3B%3C%2Fspan%3E%3Ca%20href%3D%22https%3A%2F%2Fwww.lenovo.com%2Fnz%2Fedu%2Fnzeducation%2Fen%2Flogin%2Fanzedu%2F%3FipromoID%3Dnz_sitewide_carousel_b2_nzedu%22%20target%3D%22_blank%22%20title%3D%22SIGN%20UP%20OR%20LOG%20IN%22%20style%3D%22text-wrap%3A%20wrap%3B%20color%3A%20rgb(41%2C%2078%2C%20149)%3B%22%3ESIGN%20UP%20OR%20LOG%20IN%3C%2Fa%3E%3C%2Fp%3E","en":""},"id":"Pageb354b4f9-4d6e-4fae-92d1-a9fe88aa495d"},"gInfo":""},{"pcInfo":"","mAndTabInfo":"","bannerInfo":{"t_id":"Pagebf7487aa-a302-4e47-a0c2-714953ce86c3","language":{"en_nz":"%3Cp%20style%3D%22text-wrap%3A%20wrap%3B%22%3ELenovo%20Pro%20Business%20Store%20%7C%20EXTRA%205%25%20off%20everything%20with%20your%20FREE%20Lenovo%20Pro%20membership.%3C%2Fp%3E%3Cp%20style%3D%22text-wrap%3A%20wrap%3B%22%3E%3Ca%20href%3D%22https%3A%2F%2Faccount.lenovo.com%2Fnz%2Flenovopro%2Fen%2Fsmbaccount%2Fgatekeeper%2Fshowpage%3FipromoID%3Dnz_sitewide_carousel_b3_nzsmb%22%20target%3D%22_blank%22%20title%3D%22SIGN%20UP%20OR%20LOG%20IN%22%3E%3Cspan%20style%3D%22color%3A%20rgb(41%2C%2078%2C%20149)%3B%22%3ESIGN%20UP%20OR%20LOG%20IN%3C%2Fspan%3E%3C%2Fa%3E%3C%2Fp%3E%3Cp%3E%3Cbr%2F%3E%3C%2Fp%3E","en":""},"id":"Pagebf7487aa-a302-4e47-a0c2-714953ce86c3"},"gInfo":""},{"pcInfo":"","mAndTabInfo":"","bannerInfo":{"t_id":"Pagece77dd78-54bd-46e4-8447-fc2ca8729f2c","language":{"en_nz":"%3Cp%3E%3Cspan%20style%3D%22text-wrap%3A%20wrap%3B%22%3EYoga%20Slim%207%20AI%20PC%20%7C%20Level%20up%20your%20creativity%20with%20next-gen%20AI%20experiences%20on%20the%20new%20Lenovo%20Yoga%20Slim%207x.%26nbsp%3B%26nbsp%3B%3C%2Fspan%3E%3Cspan%20style%3D%22text-wrap%3A%20wrap%3B%20color%3A%20rgb(41%2C%2078%2C%20149)%3B%22%3E%26nbsp%3B%3C%2Fspan%3E%3Ca%20href%3D%22%2Fp%2Flaptops%2Fyoga%2Fai-pc-series%2Fyoga-slim-7x-gen-9-(14-inch-qualcomm)%2Flen101y0049%3FipromoID%3Dhellobar_nz_04_AI_PC%22%20target%3D%22_self%22%20textvalue%3D%22Shop%20Now%22%20style%3D%22color%3A%20rgb(79%2C%20129%2C%20189)%3B%20text-decoration%3A%20underline%3B%22%3E%3Cspan%20style%3D%22color%3A%20rgb(79%2C%20129%2C%20189)%3B%22%3E%3Cstrong%3EShop%20Now%3C%2Fstrong%3E%3C%2Fspan%3E%3C%2Fa%3E%3C%2Fp%3E","en":""},"id":"Pagece77dd78-54bd-46e4-8447-fc2ca8729f2c"},"gInfo":""}],"autoRun":true,"displayTerminal":"pc,tablet,mobile"}
Need Help? Call us on 0800 446 833 Option #2 or chat with us for order related help and access to special deals!
 Wanting to use ZIP? Chat with us or call us on 0800 446 833 option#2
Lenovo Education Store | Get access to members-only pricing across a large range of PCs & accessories. Sign up now with your Education ID. SIGN UP OR LOG IN
Lenovo Pro Business Store | EXTRA 5% off everything with your FREE Lenovo Pro membership.
Yoga Slim 7 AI PC | Level up your creativity with next-gen AI experiences on the new Lenovo Yoga Slim 7x. Shop Now
How to Install Kali Linux
Looking to install Kali Linux? It’s not surprising. Kali Linux is widely praised for its capabilities in information security and data forensics. In this article, we’ll review some basic facts about the Kali distribution and introduce you to one simple way to install it.
Created by the group Offensive Security in 2013, Kali Linux – based on Debian – is highly popular with information security professionals and so-called ethical hackers. The Kali OS core and more than 600 associated software tools and utilities are fine-tuned for tasks such as penetration testing (simulating cyber-attacks) and data auditing/forensics. Kali fits in the same category as ArchStrike, Backbox and other security-focused Linux distros.
Kali isn’t for beginners. Like any Linux OS, you can use it to run your PC, launch a web browser, or type a business document. But the focus of Kali Linux is advanced information security. If that’s what you’re looking for, keep reading to learn how to put Kali on your PC.
IMPORTANT: The instructions presented here are high-level and abbreviated compared to those provided by each Linux distributor. They’re meant only to help you decide if you’re capable of installing Linux on your PC. If you proceed, use the instructions provided by your Linux distributor. Lenovo is not responsible for any problems that occur if/when you install.
Things to do before installing Kali Linux
Before you begin, back up and save all the important data on the PC where you’ll install Kali Linux. Single-boot installs like that described here will wipe the entire hard drive, and while there are options to install Kali using only unused disk space, errors can happen. Better safe than sorry.
You also need to be sure your system will support Kali Linux. The Linux OS doesn’t demand much in terms of resources, but Kali – like all distros – has some minimum requirements (these were effective in early 2021):
Kali Linux – Supported platforms:
- amd64
- i386
- ARM
Kali Linux – System resources:
- Basic server shell (no desktop or software):
- 128 MB RAM (512 advised)
- 2 GB disk space
- With standard desktop and software tools:
- 2 GB RAM
- 20 GB disk space
The installation steps described here also require a writable CD/DVD drive or USB drive and appropriate media on which to save the downloaded ISO and other files. [Network install options are available but not described here.] You may also need a hypervisor such as Linux KVM, Oracle VirtualBox or Xen to help you create and manage the Virtual Machine (if used), and a utility to create bootable USB media (Etcher, Rufus, usbimager, etc.).
Installing Kali Linux (single-boot)
Installing Kali Linux is simple. Depending on your level of knowledge, you can choose from guided and manual installation options. The steps we describe here are high-level and do not address every option. Naturally, complete details are available at the Kali website, Kali.org.
The installation process described here is a single-boot one – meaning you want Kali Linux to be the only OS on your PC. The Kali installation software will give you additional options, including dual-booting to either Linux or another OS such as Windows, but these steps are not listed in this article.
Download the Kali ISO & change boot order
Start by downloading the Kali Linux ISO package from Kali.org. As of early 2021, you can choose from “Kali Linux ISO” for CD/DVD media or “Kali Linux Live” for USB media. Copy the files to CD/DVD or use one of the above-described utilities to image the files to bootable USB.
Next, depending on your chosen media, set your system to boot from either the CD/DVD drive or USB drive, so the Kali ISO and bootloader can be activated in the next step. See How to Install Linux for more on changing the boot order, whether by using a special key combination to enter Setup mode or by editing the BIOS file.
Configure and initiate the Kali installation
To configure and initiate the Kali installation, follow the instructions on the Kali website. For now, here’s a high-level look at the steps* required to install the downloaded ISO package:
*At various points, you’ll be prompted to choose your language, location, keyboard type, time zone, and so on. To keep things simple, we do not list each of these steps in the list.
- Boot your system. The Kali installer will be recognized and the process will begin.
- Choose your installation method: graphical or text-based. [There’s a third option for live installs, but that’s not described here.]
- Enter your system hostname for networking.
- Create your initial user account(s) and password(s).
- Choose how to configure and partition your disk: This is where you choose a basic single-boot environment (wipes disk) or one of the other options not described here (including a dual-boot option that attempts to install Kali on biggest area of available free disk space).
- Choose guided or manual installation (based on your skills and abilities).
- If desired, you can encrypt Kali Linux so a password is needed to launch it.
- Designate the disk on which to install Kali.
- Confirm your selections and – when ready – choose Continue. This initiates the partitioning process and installs the Kali OS core but not the desktop environment, metapackages, and so on.
Depending on your selections in the steps above, you may be instructed to take additional steps at this time. This can include choosing encryption passwords, entering HTTP proxy information, etc.
Finish installing Kali Linux
With the Kali OS core installed, next you’ll choose the metapackages to install, including the Linux desktop (by default, it’s XFCE, but you can choose others, such as Cinnamon or something else). Metapackages are curated collections of Linux applications – in the case of Kali, this includes the 600+ security tools and utilities that have made the distro is famous.
You’ll also be asked whether to install the bootloader within the primary disk partition – doing so will mean the Kali OS you just installed there will automatically load every time you turn on your PC. You’ll skip this selection in a dual-boot scenario (so you can choose which OS to load each time).
Finally, reboot your PC. Based on the choices you made above, it should immediately launch Kali Linux – ready to use.
You may now proceed to typical post-installation steps. Examples include checking for the latest OS upgrades, changing default passwords, and perhaps saving a system snapshot for easier backup and recovery if needed later.
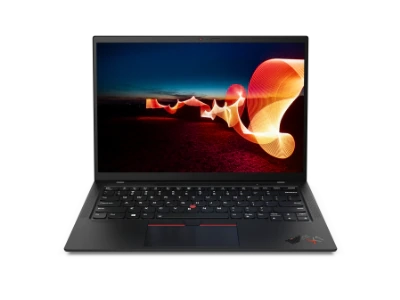
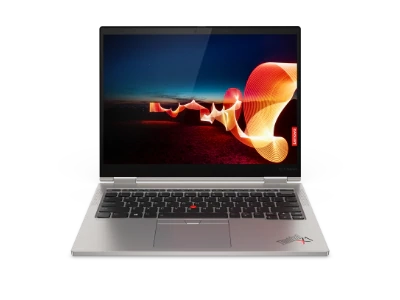
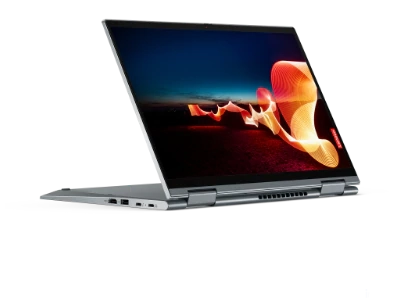
Shop Related Products
Shop Lenovo Intel® Evo™ Certified Products


open in new tab
© 2024 Lenovo. All rights reserved.
© {year} Lenovo. All rights reserved.
Sign up to receive 10% off* your first purchase
Please enter the correct email address!
Email address is required
Select Country / Region:

Please select a Country / Region
- About Lenovo
- Our Company
- News
- Investor Relations
- Legal Information
- Jobs at Lenovo
- ESG
- Products & Services
- Laptops & Ultrabooks
- AI PC
- Desktops
- Tablets
- Workstations
- Servers
- Accessories & Software
- Services & Warranty
- Deals
- Gaming PCs
- Yoga family
- X1 family
- Replacement Parts
- Product Recalls
- Customer Help
- Contact Us
- Where to buy
- How to Pay
- Shopping Help
- Online Terms of Sale
- Order Lookup
- My Account
- Support
- Lenovo Competitive Price Match Policy
© 2024 Lenovo. All rights reserved.
© {year} Lenovo. All rights reserved.
×